How to Configure Voicemail to Email
- As An Office Manager Or Reseller User
- As A Basic User
- E-mail Notification Types
- Send w/ hyperlink
- Send w/ attachment (leave as new)
- Send w/ attachment (moved to saved)
- Send w/ attachment (moved to trash)
E-mail to voicemail is one of the defining Unified Communications features of a modern VOIP system. The below information should guide you on how to configure Voicemail to E-mail on the AVATAVA Softswitch.
As An Office Manager Or Reseller User
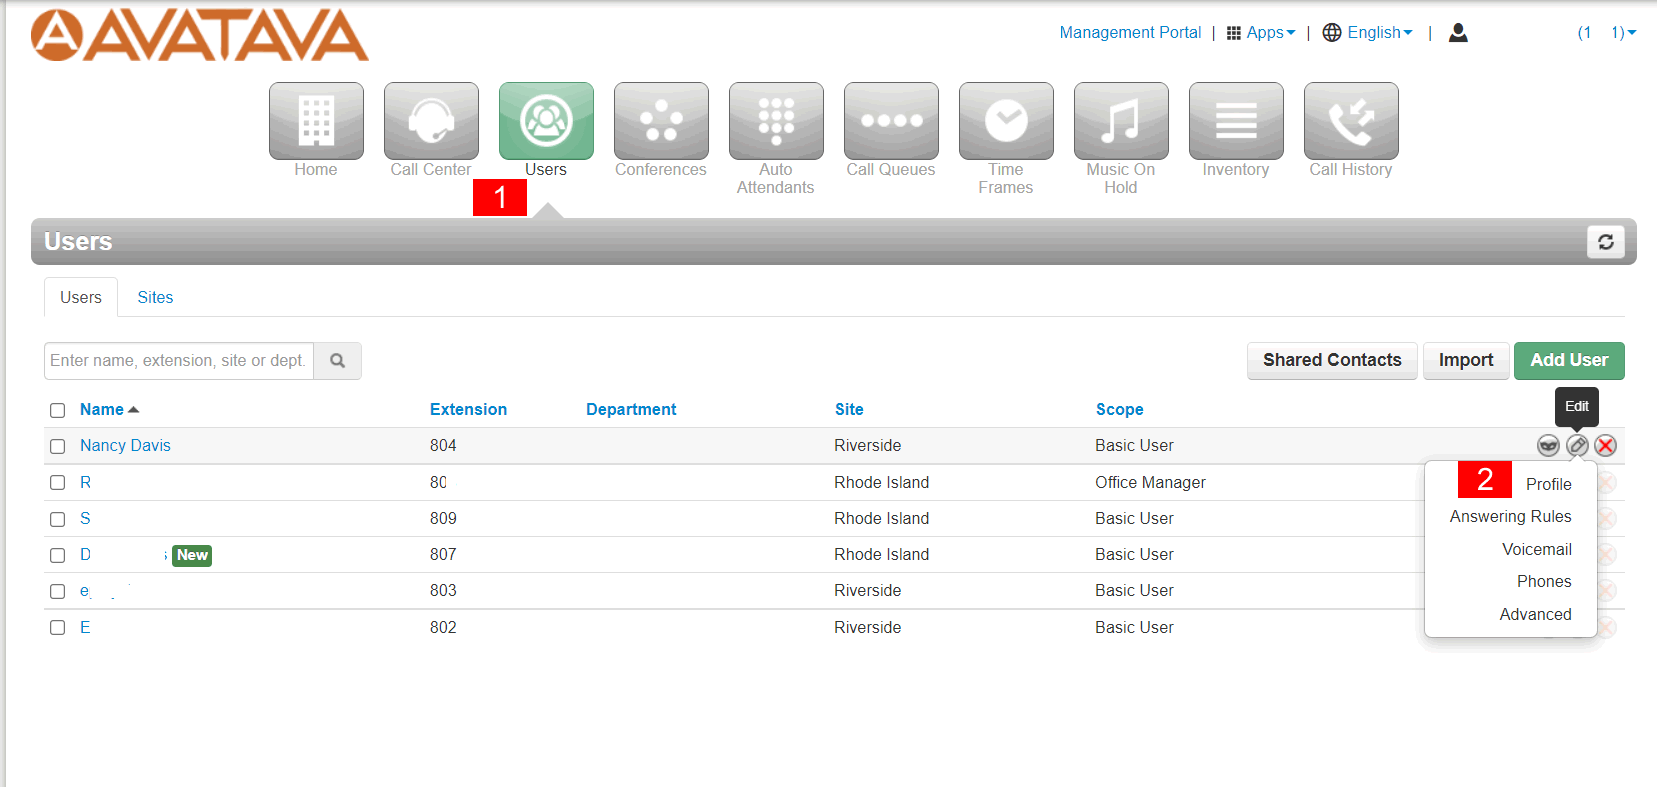
- From the Domain of the User you wish to configure, select the Users Button
- Select the Edit button next to the User you wish to configure and select Profile from the drop-down menu

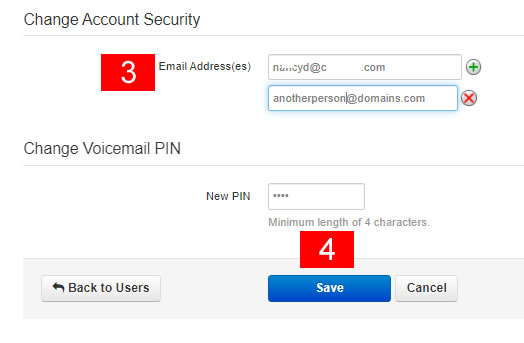
- Scroll to the bottom of the Profile tab to the Account Security section and make sure the e-mail address is configured. Note by selecting the mceclip1.png you can add additional e-mail addresses to notify multiple individuals.
- Once all e-mail addresses have been entered, select the Save button.

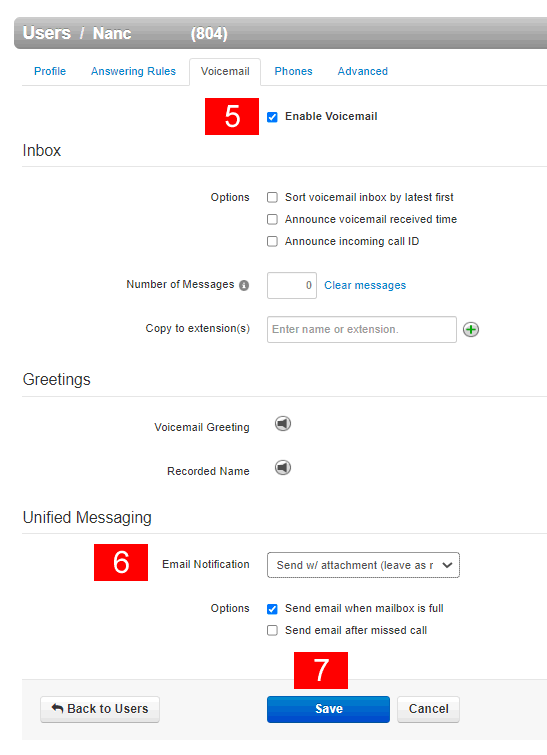
- Make sure the Enable Voicemail checkbox is checked
- Select the Email Notification type the User would like from the drop-down menu (see the e-mail Notification Types below for more information).
- Select Save. Voicemail to e-mail is now configured for this User.

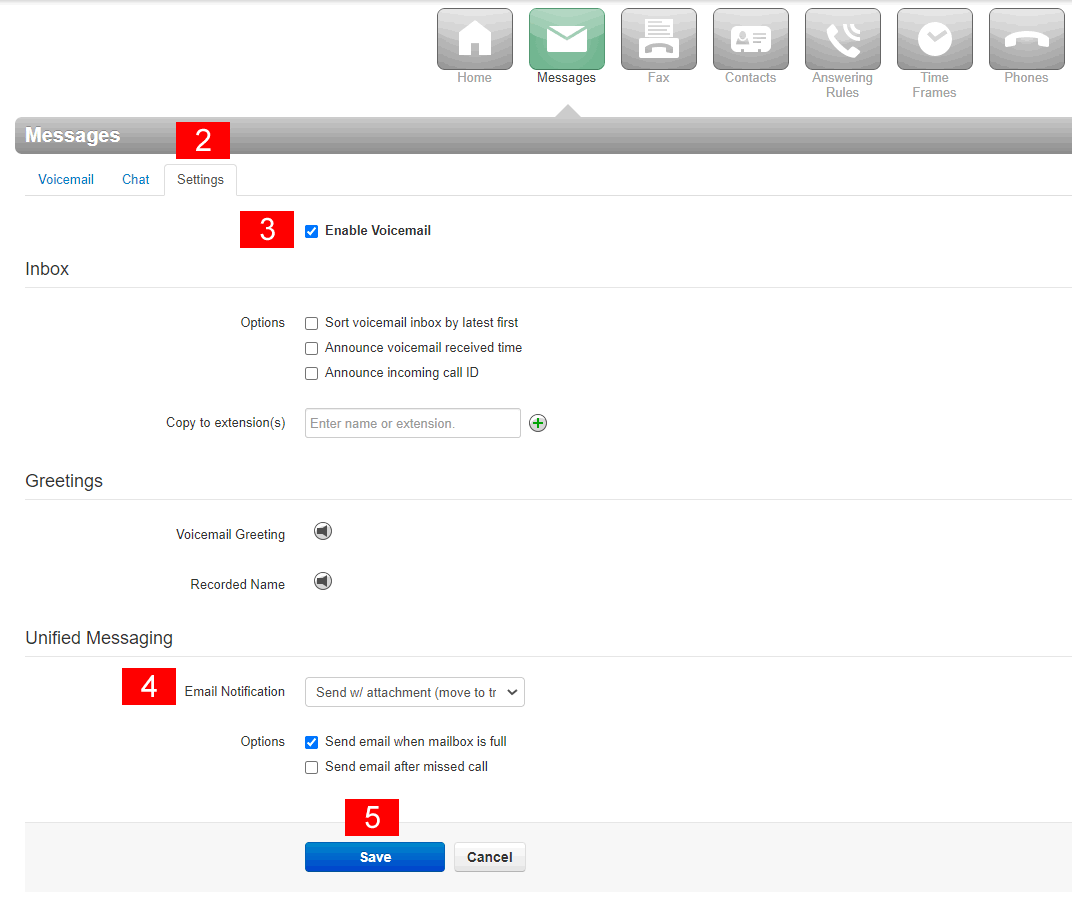
- From the Basic User Home, select the Messages Tab.

- Select the Settings Sub-Tab.
- Make sure the Enable Voicemail checkbox is checked
- Select the Email Notification type you would like from the drop-down menu (see the E-mail Notification Types below for more information).
- Select Save. Voicemail to e-mail is now configured.

- Send w/ hyperlink- User should receive an HTML formatted e-mail with the Domain branding with a listen button to download a WAV file to listen to the voicemail recording. The voicemail will be left marked as New in the voicemail box.
- Send w/ attachment (leave as new)- User should receive an HTML formatted e-mail with the Domain branding with a WAV file attached to the e-mail. The voicemail will be left marked as New in the voicemail box.
- Send w/ attachment (move to saved)- User should receive an HTML formatted e-mail with the Domain branding with a WAV file attached to the e-mail. The voicemail will be moved to the Saved folder.
- Send w/ attachment (move to trash)- User should receive an HTML formatted e-mail with the Domain branding with a WAV file attached to the e-mail. The voicemail will be moved to the trash folder. All voicemails in the trash folder are deleted between 3am to 7am Pacific.
This is our most popular and recommended Voicemail to E-mail option
Note: If voicemail transcription is enabled, very brief Voicemail to E-mail recordings may not include a Voicemail transcription.

