AVATAVA support the Avaya J100 Series phones including the Avaya J129, J139, J159, J169, and J179 Open SIP models with J100 Expansion Module.
AVATAVA only support Avaya phones which use the Open SIP protocol - other software loads will not work with the AVATAVA Cloud Softswitch.
Avaya J100 Series Limitations
Please note that feature support and SNAPbuilder support may be limited on these models and we only recommend the use of these phones at this time if the client has already purchased the phones or has a strong preference to use Avaya phones. The following limitations are known to AVATAVA at this time:
- The J129 model does not support the use of SNAPbuilder. The phone can be provisioned by the AVATAVA Cloud Softswitch.
- The minimum supported firmware is v4.0.5
- The J129 and J169 have been marked End of Sale by Avaya and may lose product support
- The Avaya J100 series phones only support one line registration
Provisioning Process
1. Once the phone has booted up for the first time, select cancel from the "Open Enrollment Code" page and select the "Admin" softkey.
2. Enter the default password of 27238
3. Go to IP Configuration > Ethernet IPv4 and note the IP address
4. Select the "Back" softkey twice, and scroll to the bottom of the Main Menu, and select "Web Server"
5. Toggle "Web server" to On and "Web on HTTP" to On. Select the "Save" softkey.
6. From a web browser on the same local area network, enter the IPv4 address noted above. Make sure to utilize https://<IPv4 address>
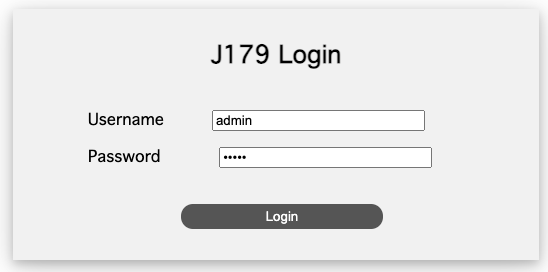
7. Log in to the phone using the login of admin with the default password of 27238
8. Change the password to one of your preference. Once provisioned, this will change to the AVATAVA default password. Select Update and then log into the phone utilizing the password you just set.
The new password is required to have 8-31 characters, one number, one letter, and one symbol
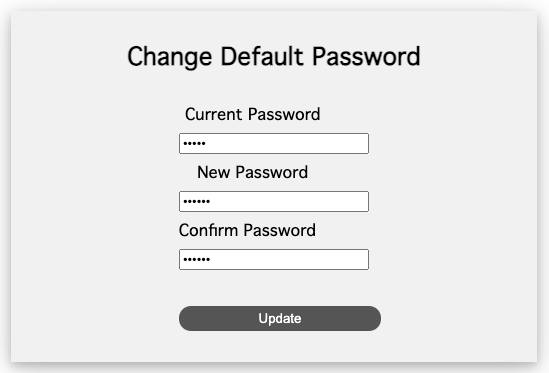
If you are having trouble with the password reset process, try another web browser. In testing, some versions of Chrome have not correctly reset the password.
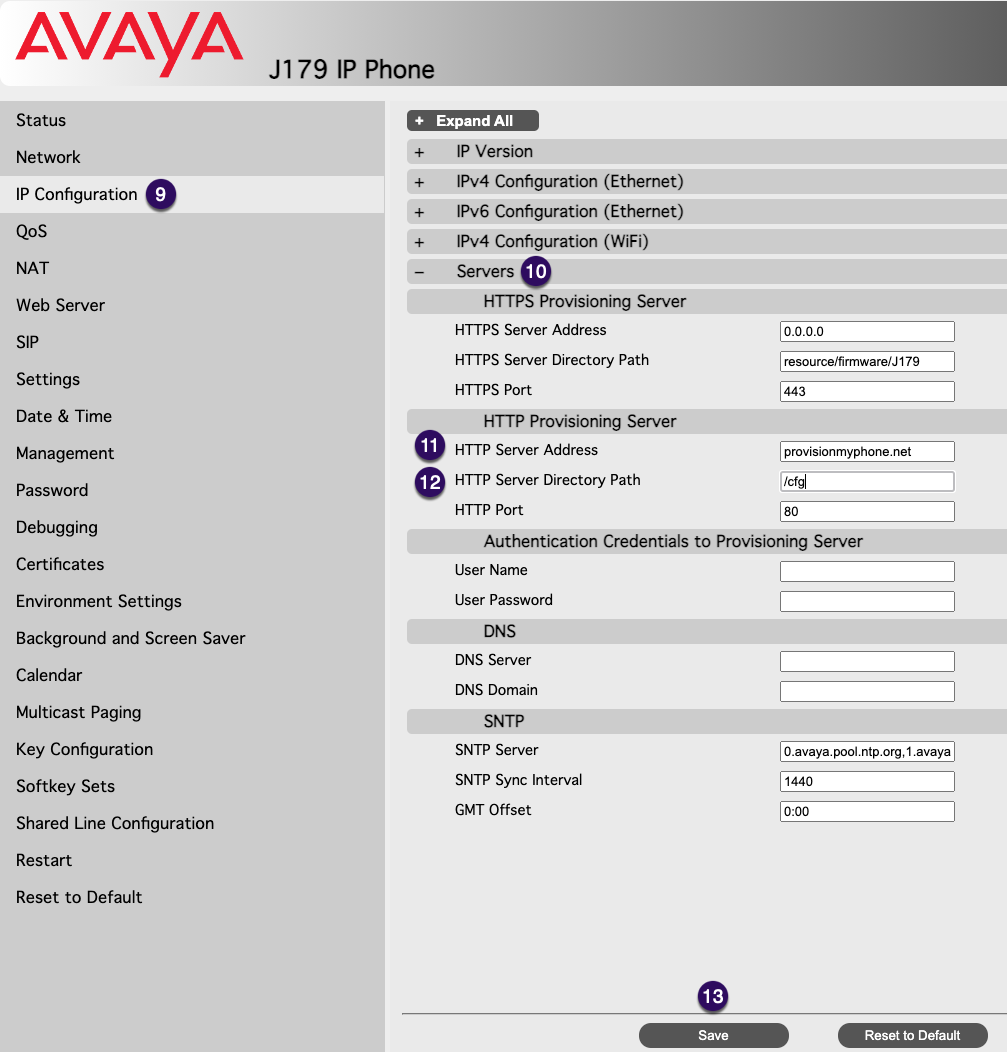
9. Select IP Configuration
10. Select Servers
11. Under "HTTP Provisioning Server" set the HTTP Server Address to provisionmyphone.net
12. On the "HTTP Server Directory Path" set the value as /cfg
13. Select the "Save" button at the bottom of the screen
14. From the menu on the left, select the "Restart" option
15. From the popup, click "OK"
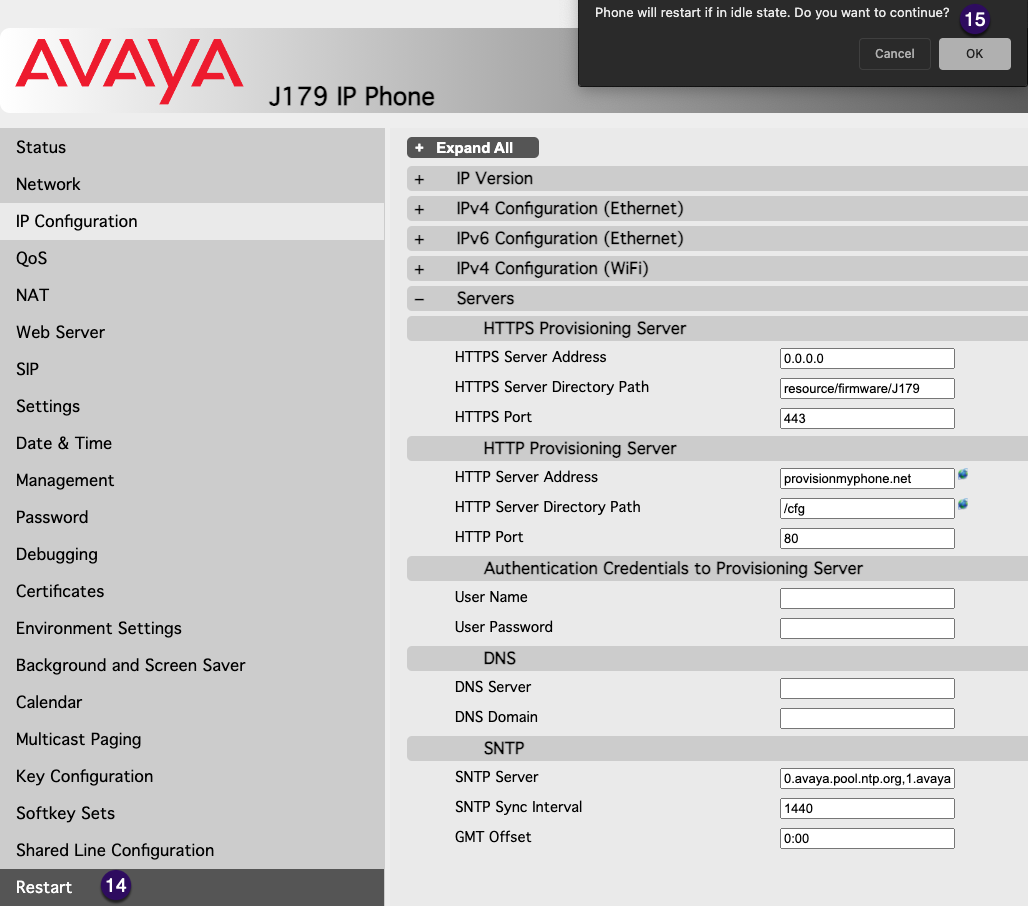
15. After the phone reboots, it should be added to the AVATAVA Cloud Softswitch and provisioned for use.
